
June 11, 2020
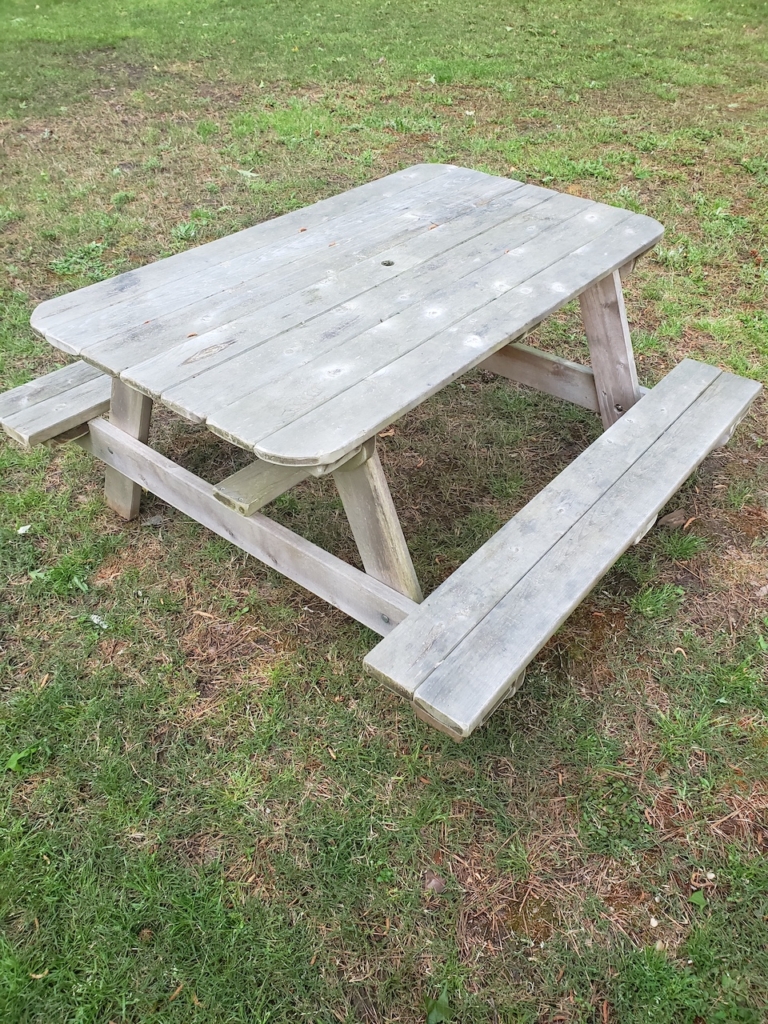
A few years ago, our boys received a brand new beautiful wooden picnic table from one of their aunts. We were all so excited and they loved sitting and eating at their very own table. It is the perfect size for them and has served them well as a craft table, fort, and even as a spot for time out when they need to settle down a bit. Last year, I noticed that the table was looking a little worn so naturally I purchased some disposable table covers and kept in moving. I think I was in denial about how the table was deteriorating right in front of us because we failed to protect it early on. The kids’ picnic table and the playground came with the materials to properly seal and protect the wood but we just never got around to doing it. Now the kids’ outdoor table was starting to look like it had been around for 100 years and I felt awful about our lack of stewardship over it.

Week 1 // Week 2 // Week 3 // Week 4 // Week 5 // Week 6 // Week 7 // Week 8
Once we started to develop our plan for the One Room Challenge, I knew it would be the ideal time for a DIY painted picnic table project. I mean, you can’t build new outdoor furniture and upgrade other spaces and just ignore the raggedy looking kids’ table! It was definitely time for the picnic table makeover. I could have just cleaned the table, sanded it down, and then applied the sealant but with our new plans for the space the natural wood color just would not work as well in my opinion. So I decided to paint it and put a fun design on the tabletop.
My plan was to use materials that I already had on hand to make this super cost-effective. In my paint stash I had gray, black, white, and mariner (Sherwin Williams) which was perfect because those are essentially the same colors we are using in this space and they were all outdoor paints. I also had a fresh roll of frog tape which led me to pretty quickly decide on a geometric design for the top of the table.
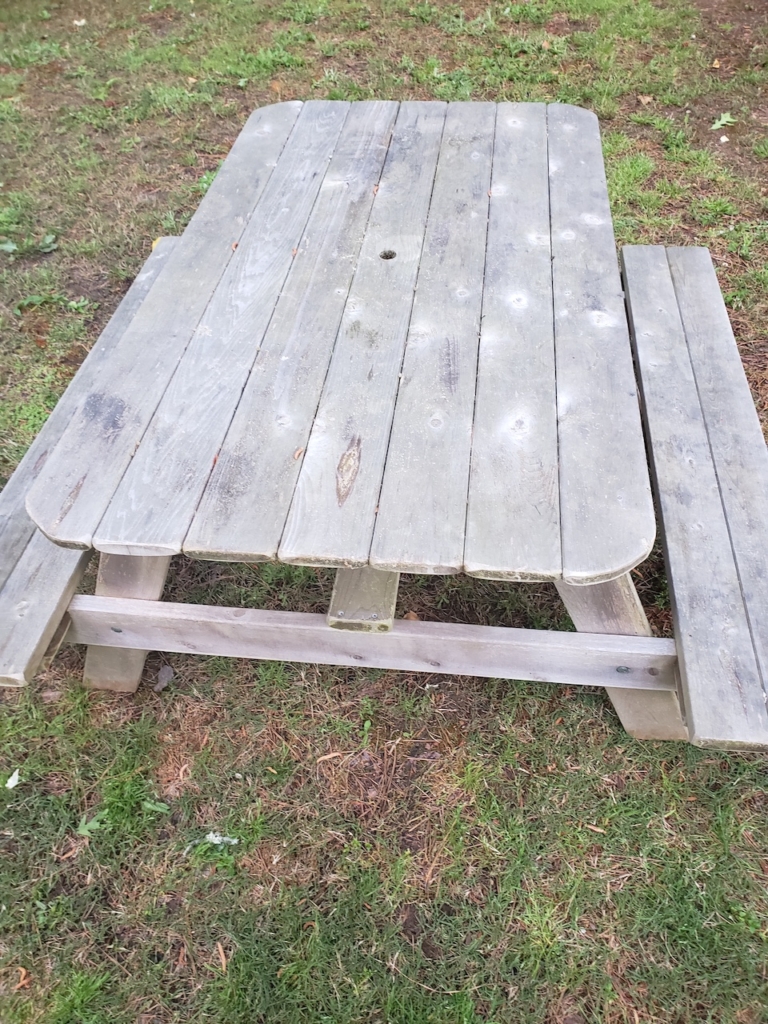
To get started, I first pressure washed the table. Let me just tell you that I was absolutely amazed at how much dirt and grime was piled on it. I mean, I had no idea! I even forgot what the table looked like originally! I did get a little carried away with the power of the pressure washer and inadvertently caused some of the wood to split. Thankfully it was not enough to destroy the table or anything! Just look at the difference between the washed table and the unwashed table. What a difference right?
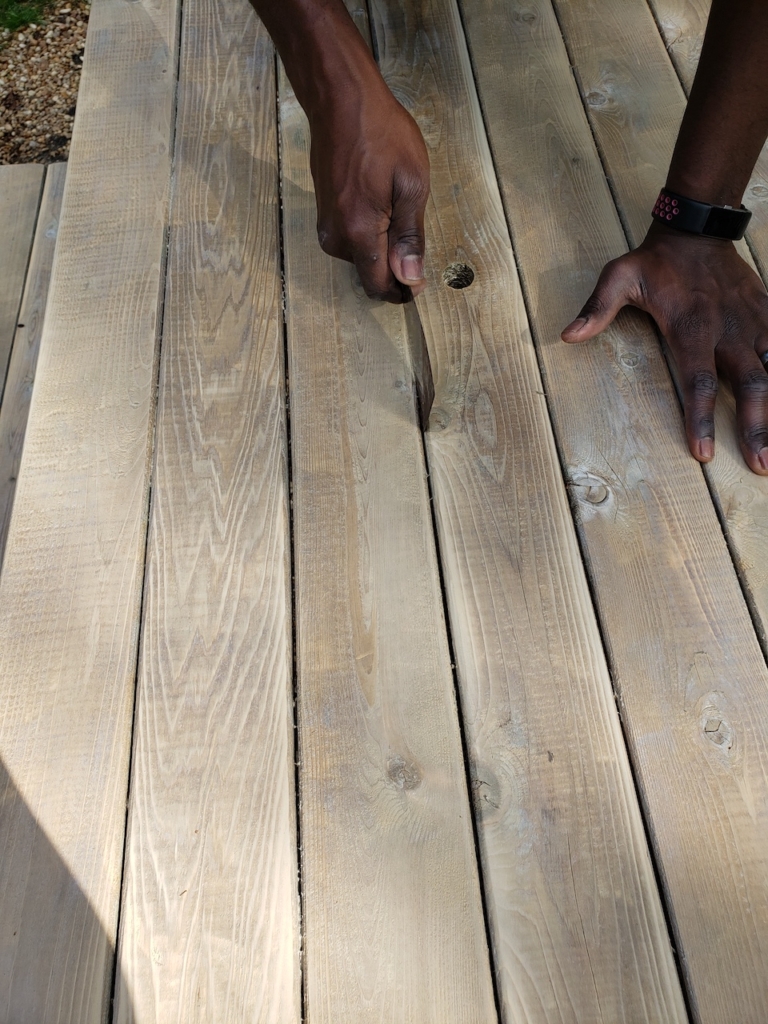
Once the table was clean, my husband moved it into the garage and we let it dry for a few days. The last thing I wanted to do after I got it all nice and clean was leave it outside for a bird or some other creature to live its mark on it. After it was dry, we moved it back out and sanded it all down nice and smooth!
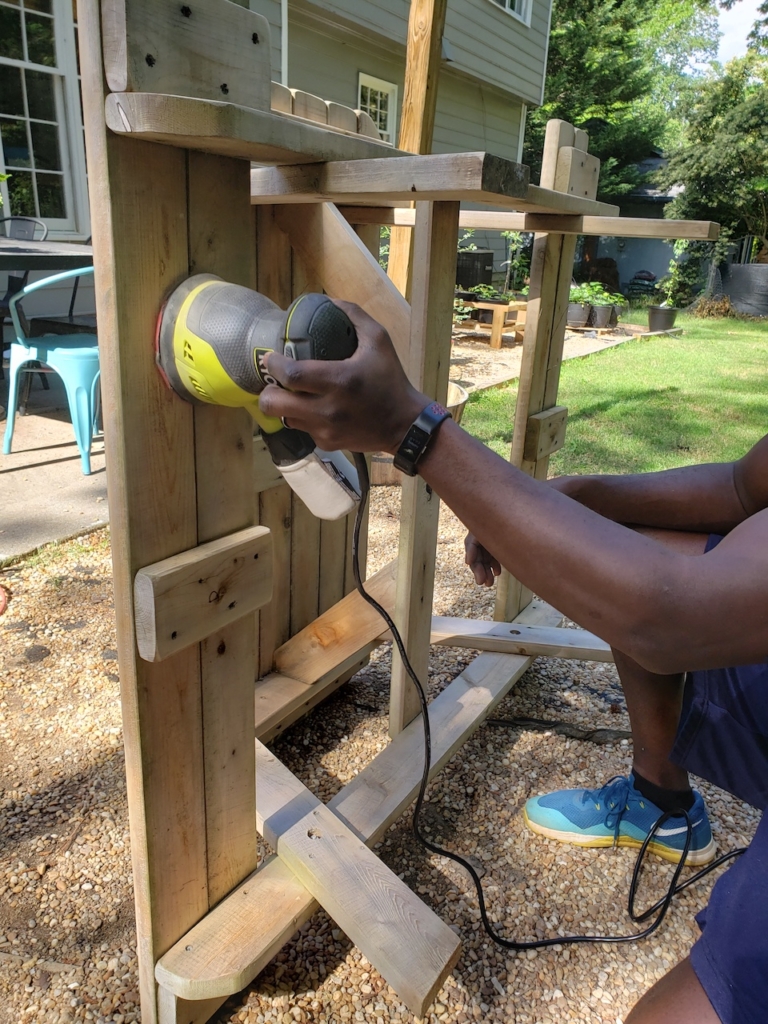
We realized that a good sanding job was not all that was needed to get this table ready for paint. We also had to get in between each of the pieces of wood on the tabletop and remove the dirt and pine straw. Of course, you will also want to use a tack cloth or some type of cloth to clean off the table prior to painting.
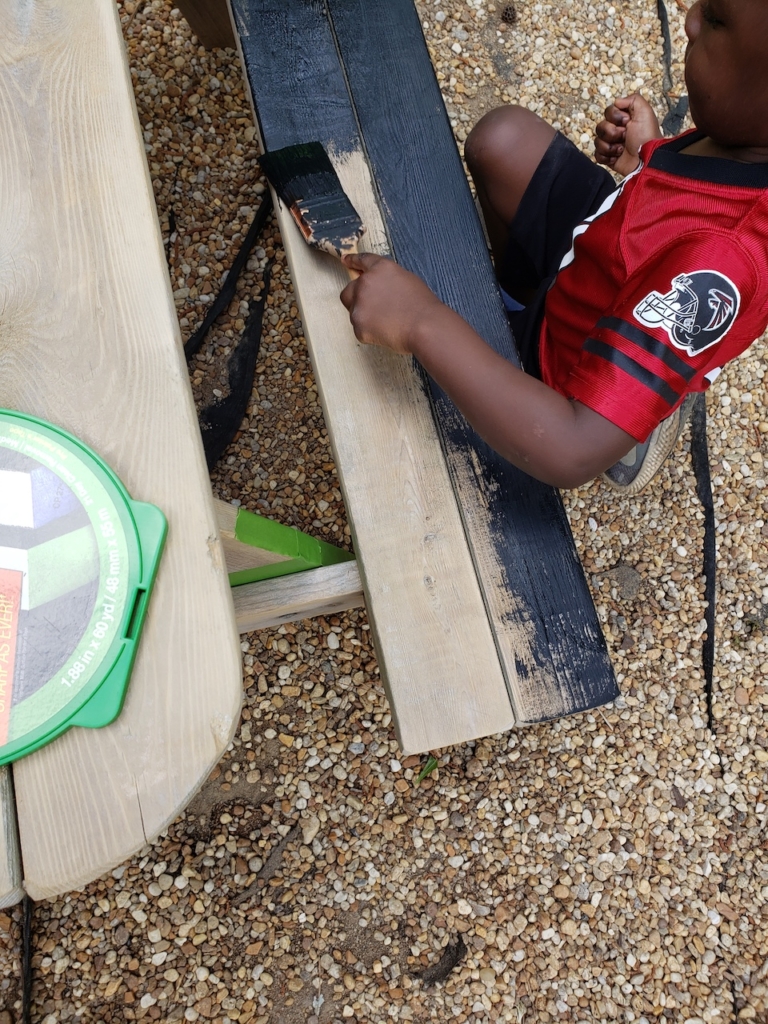
Next, it was time to paint! I did not realize how tedious this part would be. I determined in advance that I would make the benches and a few of the cross bars under the table black, everything else would be white, and the top of the table would have all of the colors plus the gray and Mariner. I even had some little helpers join in for this part.

Make sure you tape off the sections you do not want painted a particular color, especially if you have little people involved.
Now, the fun part! I used the frog tape to create a variety of shapes and lines across the top of the table. To ensure crisp lines I used caulk to seal the tape. I have also seen people paint the edges of the tape the same color as the base color. From what I have seen, both methods are pretty effective in ensuring the paint does not seep through the lines. I just tried the caulk method first, so that is the one I tend to use.
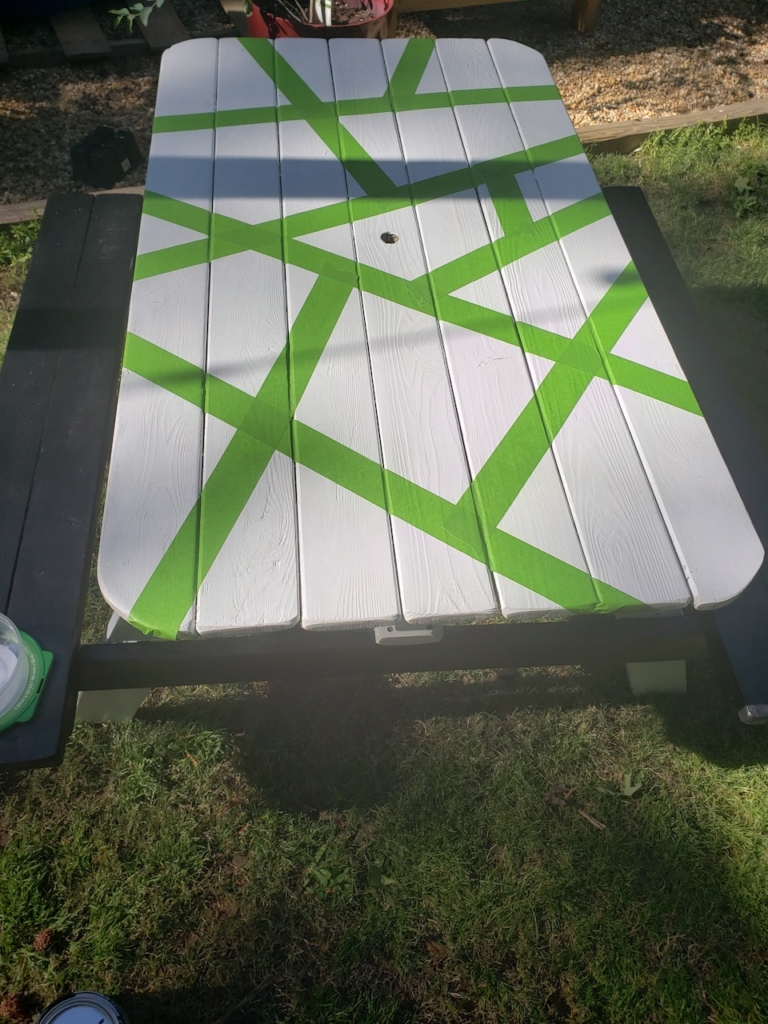
I randomly selected the colors to paint each area with, making sure to spread the colors out as evenly as possible. Once that was all done I pulled the tape off and let it sit to dry. You want to be careful to pull the tape off before the paint is actually dry.
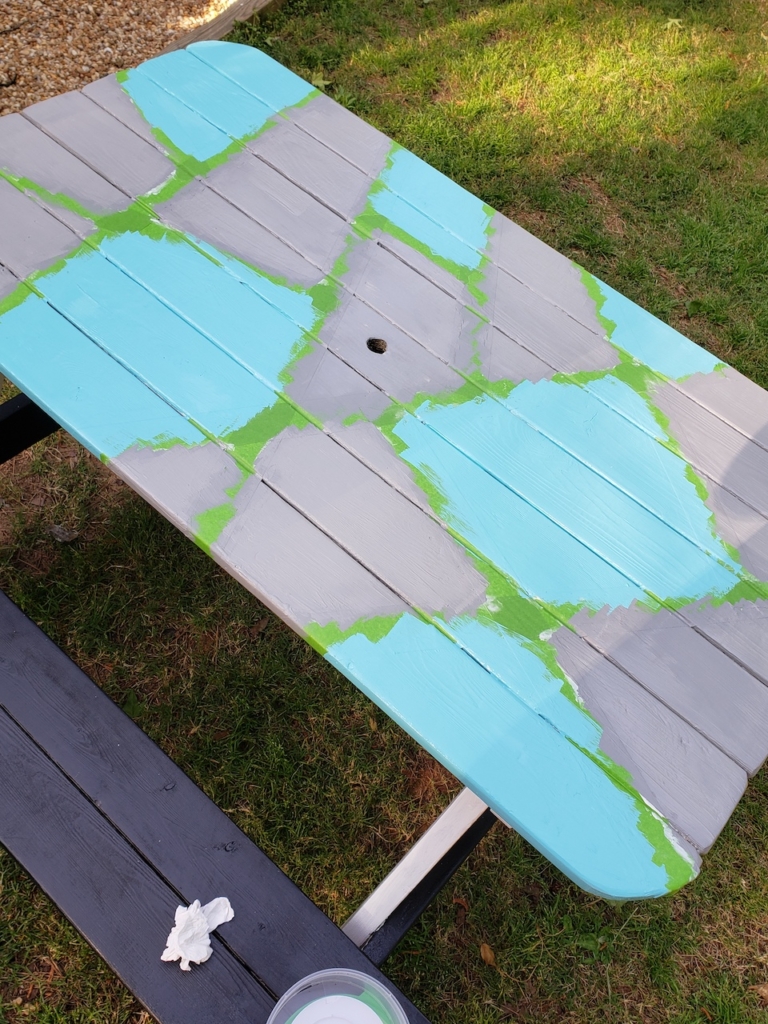
I did have an issue with my Mariner blue paint’s lines. I believe it is either the paint type or the age of the paint that may have caused the lines to not be perfect. As you can see, several of those lines were imperfect. However, it was a pretty easy fix with a small paint paintbrush and a little bit of paint.
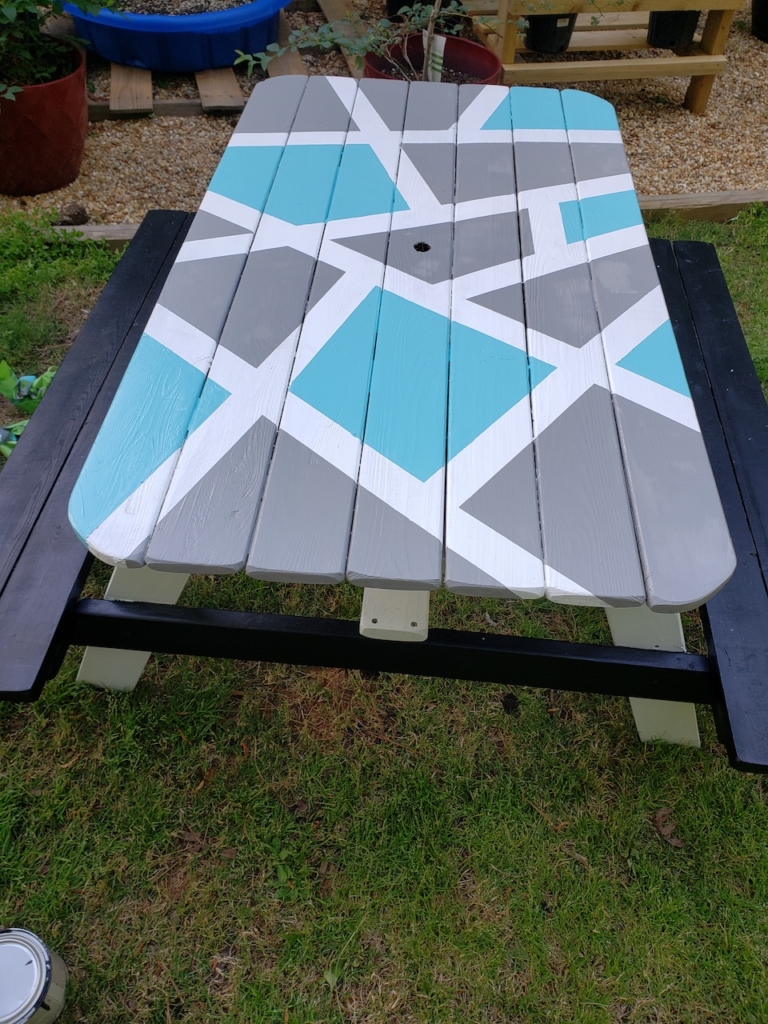
Hopefully it will be easy to clean and maintain for years to come now. I can already see our boys sitting and playing around at this table. What do you think? Would you attempt this table makeover?
Head over the other One Room Challenge blog to check out the progress of the other participants!


You know i love it! Such a fun project!
Thank you Deb!
What a lovely transformation. Love that the kids got to help out
Thank you Torie! They loved it!
I need to start getting my boys included on my projects!! It’s so friggin cute! I’m about to overhaul my backyard myself, so I’m hanging on your every post here and cannot wait until week 8!
You definitely should! They are such good workers and feel so proud of themselves when they are finished!
Looks amazing! such a fun piece – I love it!
Thank you!
Comments