May 14, 2020

It is week two of the One Room Challenge and I am so excited that we decided to build a greenhouse! My interest in gardening has been constantly growing. More specifically, my desire to grow my own fruits and vegetables from seed has grown. I can’t really describe how amazing it feels to see something you started growing from a little bitty seed develop into a plant that yields food for you and your family.
For a long time, I believed that it was unattainable for me. I didn’t have a greenhouse, I had very little knowledge, and I had no clue where to start. However, I did just that… I started. I ordered some seeds from a couple of websites recommended by one of my garden mentors, purchased some grow lights from Amazon, and set up a table in my garage to start my seed starting adventure.
That garage “greenhouse” experiment yielded some pretty decent results, but it also caused me to take up valuable space in the garage. My set up included a full size folding table and a greenhouse rack, along with pots, dirt, watering cans, and fertilizer spread out everywhere. My husband, though loving and super supportive, clearly wanted his garage gym space back!
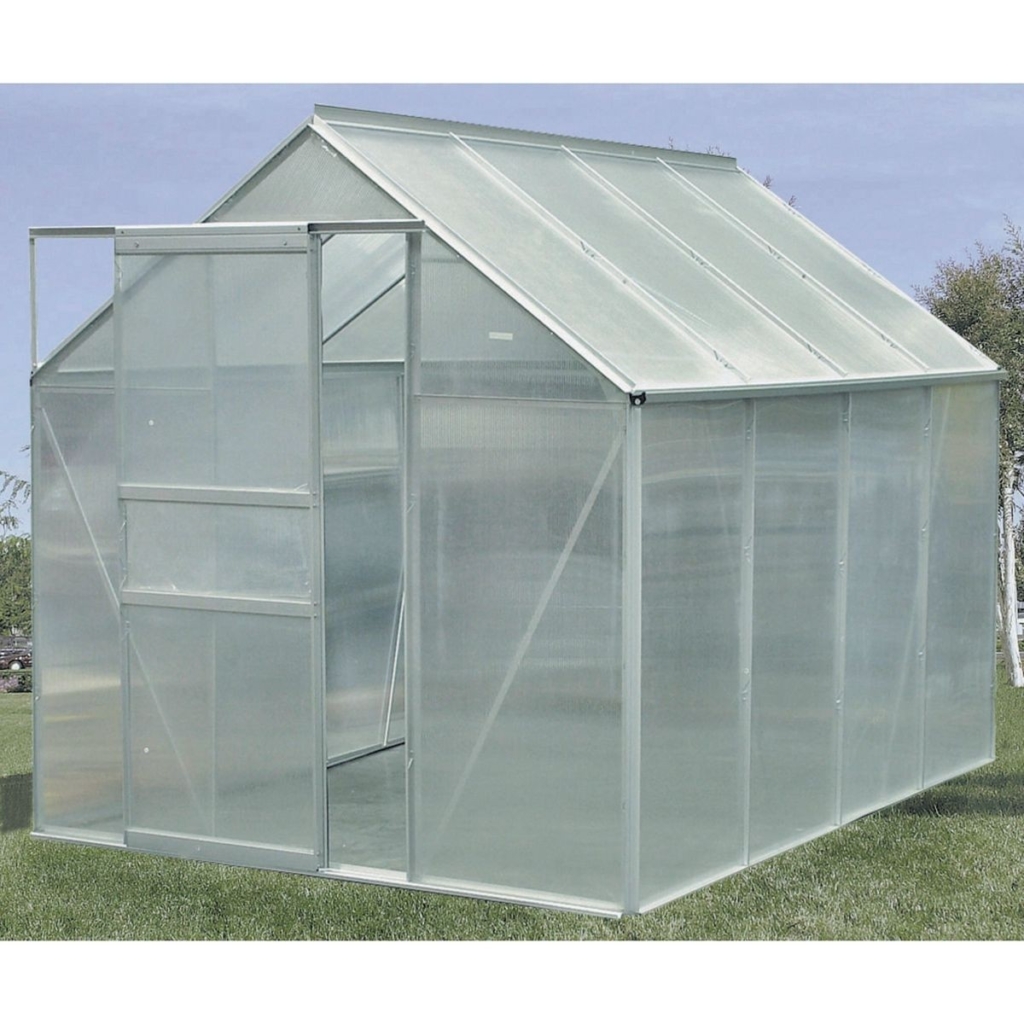
I began to do some research and realized that having a backyard greenhouse was not really out of reach. While this is a DIY project, we elected to not try to create our own DIY greenhouse plans from scratch. Instead, I found a few resources and kind of combined them. I found this inexpensive Harbor Freight greenhouse kit and knew that we could adapt it to be what we needed it to be.
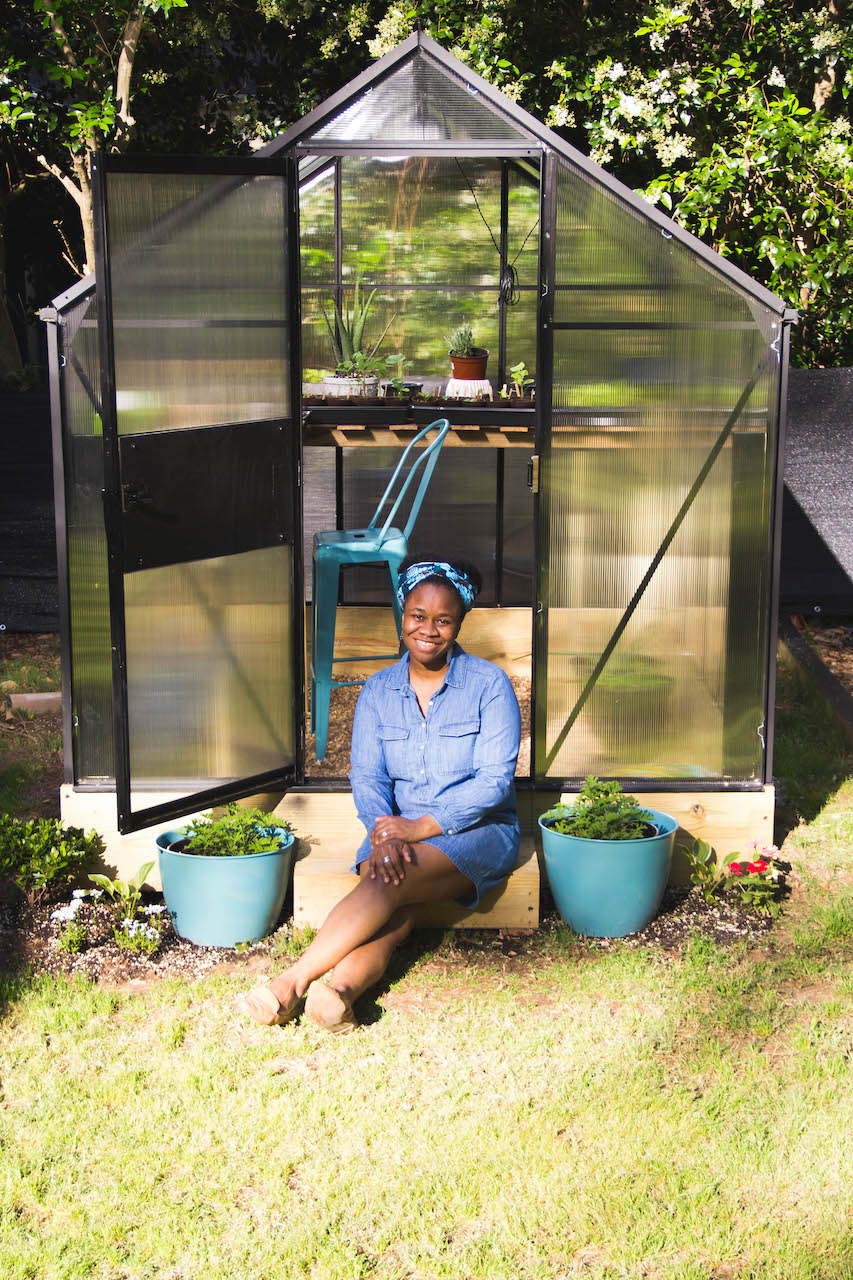
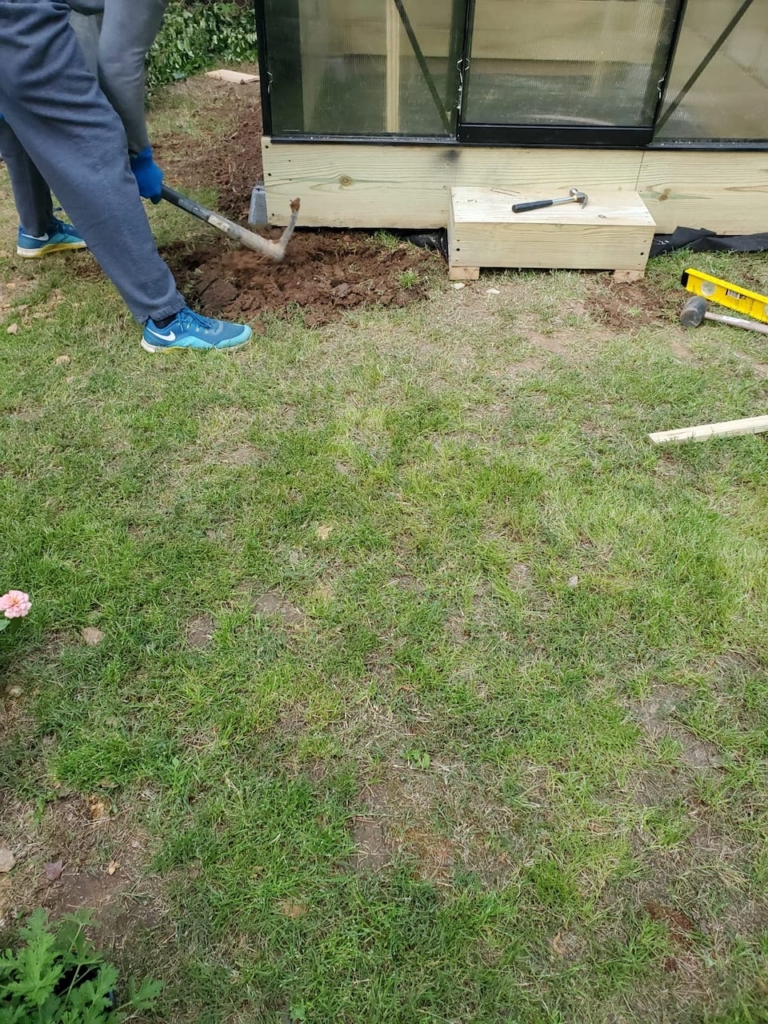
My desire was not for the greenhouse to overtake my backyard or to break the budget so I chose the 6 feet by 8 feet size. Once I knew what we would use for the form, I went on a hunt to figure out the foundation and structure. I was not a fan of the look of the greenhouse frame directly on the ground. I also really wanted to make sure that it was as solid and sturdy as possible. Lately, it has been super windy and storming a lot so I am glad that we did the extra work to make sure it is as sturdy as possible. And by we, I mean he, as in my amazing husband!
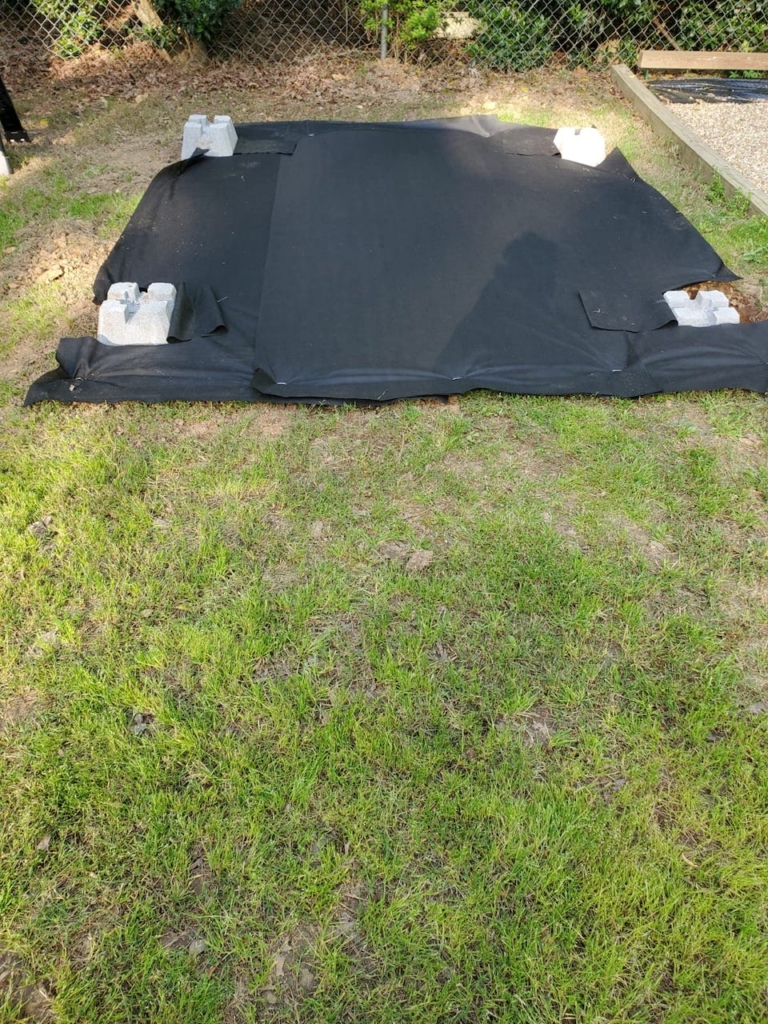
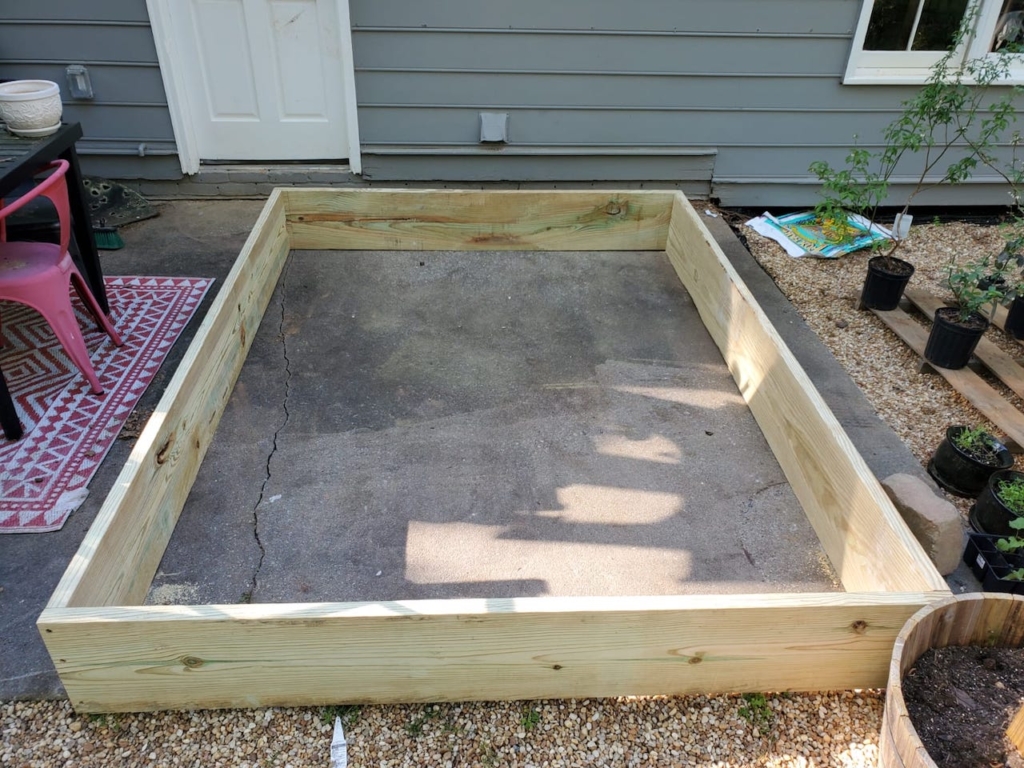
I came across this tutorial and I knew that this would be a good starting point for what we wanted to do. We just made a few changes to make it more suitable for my needs and some of my quirks. The first thing we (he) did was to prepare the ground that the greenhouse would be build on.
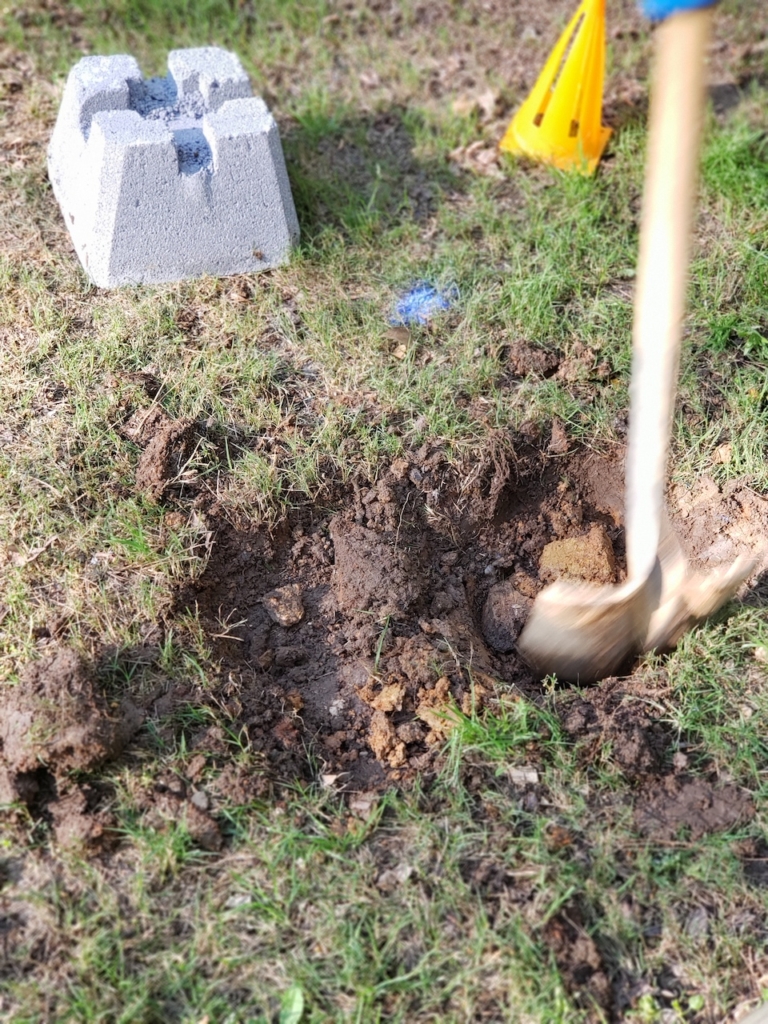
He then went on to start building the foundation. I actually assisted with this part and had to use my muscles to do it! To be honest, I sometimes feel bad because he does so much of the work and heavy lifting. He obviously enjoys it, but I still enjoy it when I can participate in a way that truly helps him and does not hinder his progress. I am in the process of learning how to use power tools, but that is a very slow moving train.
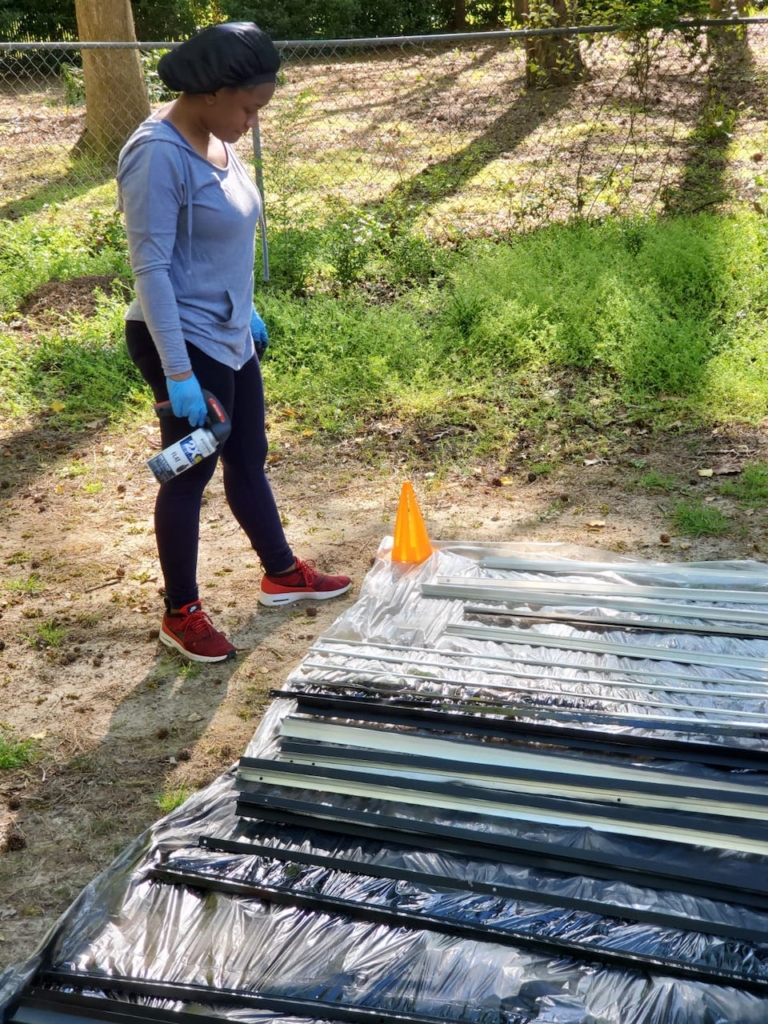
While he was working on the foundation, I grabbed a few cans of black spray paint and painted all of the aluminum frame pieces that came with the kit (more on this a little later). For the look I want in our backyard, I felt that black would look better and I am extremely pleased with that decision! I cannot lie, the painting was very tedious.
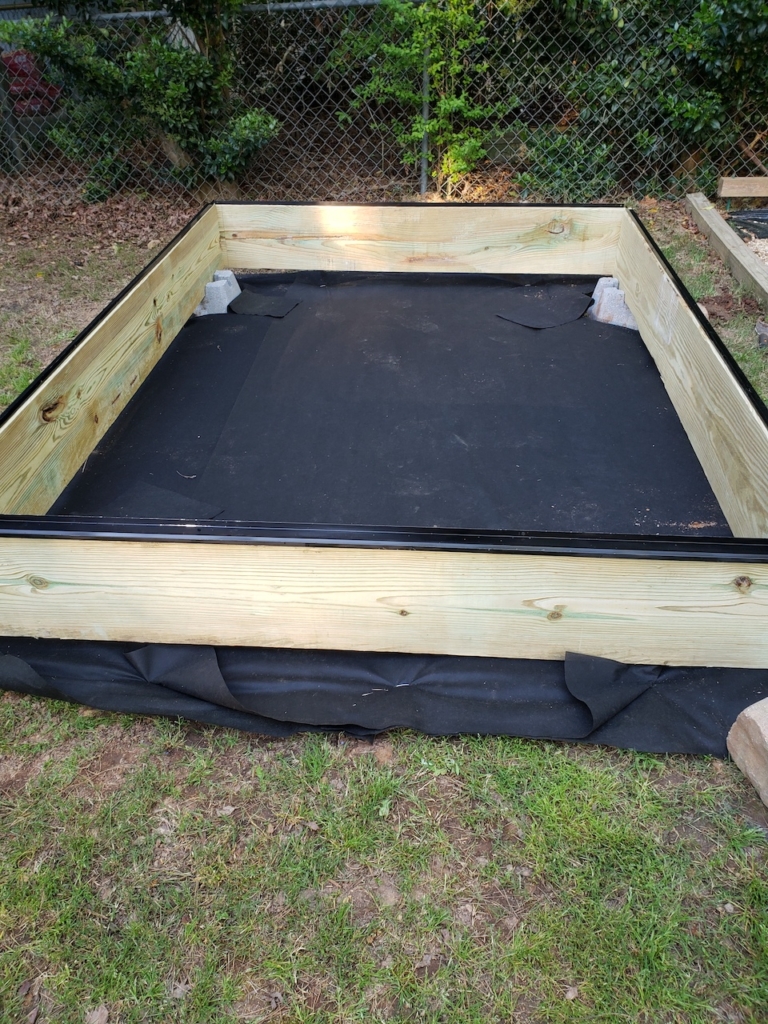
Once he was done with the foundation he built the frame. It needed to be built on a flat surface, so we he had to build it on our tiny patio and then we carried it over to the build location.
When I tell you that the frame was heavy… believe me! That thing was so heavy! Once we got it in place he had to ensure everything fit perfectly and was all level and square. After a bit of maneuvering he got in place and he was ready to move on to building the rest of the frame.
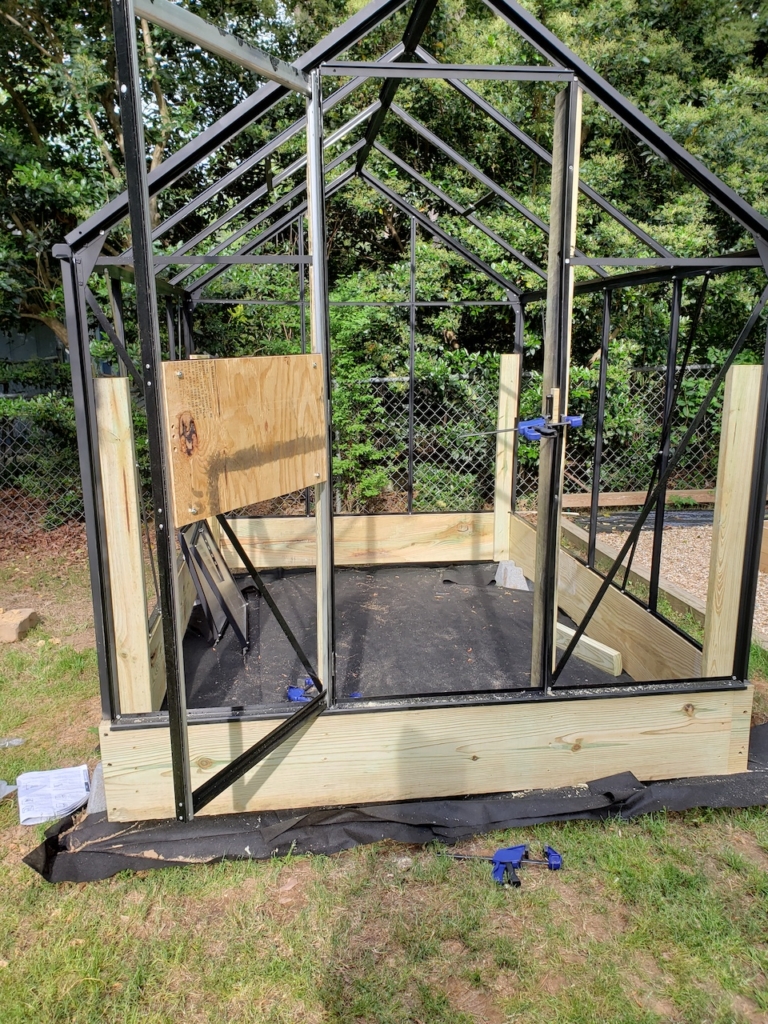
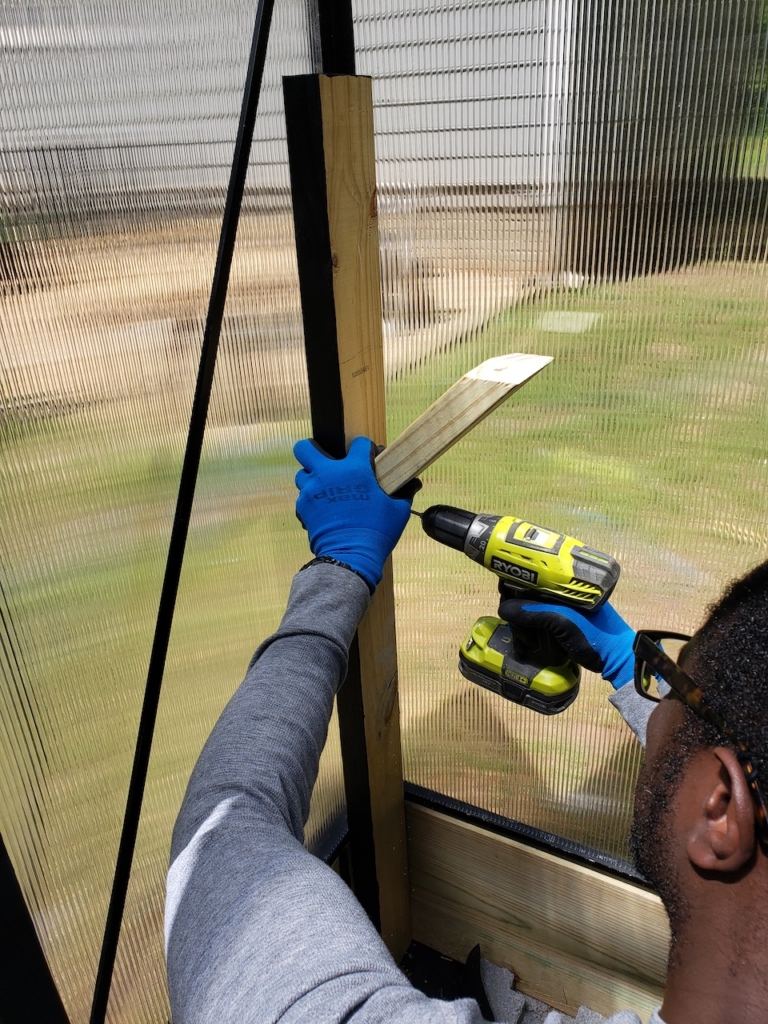
In order to reinforce the frame (as recommended by the guide and other users who have bought the kit) he used 2 x 4s in the corners. The kit came with a sliding door, however, we wanted the door to swing open. So he framed the door out using 2 x 4s. Then using the door kit, along with some door hinges, mending plates, and a screen door handle assembly, he put together a door that swings open.
I also decided that I would prefer to step up into the greenhouse instead of the door opening being even with the ground. This would give us the space later on to add a little porch to the greenhouse if we ever wanted to. (hint: I really want to!)

The build progressed fairly quickly once those things were completed. He was able to install and secure the aluminum kit frame and the UV-coated polycarbonate panels (kind of like thick plastic sheets) pretty easily. For this part, he just needed to follow along with the instructions given with the kit. I did make this a bit more challenging by spraying the pieces black, BEFORE he could separate them by build section. Thankfully he was still able to identify all of the parts.
The next step was to slide all the side and roof panels into place. There are two windows/vents to this greenhouse kit. He had to assemble those prior to installation. To clip the panels into place it did take a little bit of muscle or courage I should say. I tried to put one in and was terrified that the little clip would spring back and smack me in the face. Needless to say, I did not clip the panels in.
To complete the exterior portion of the build he made simple box step for the entrance and secured it to the frame. I also hope that I can cut down on the number of critters that are able to have easy access to my plants with this step entry versus a basic walk in greenhouse. How cute is that little step?
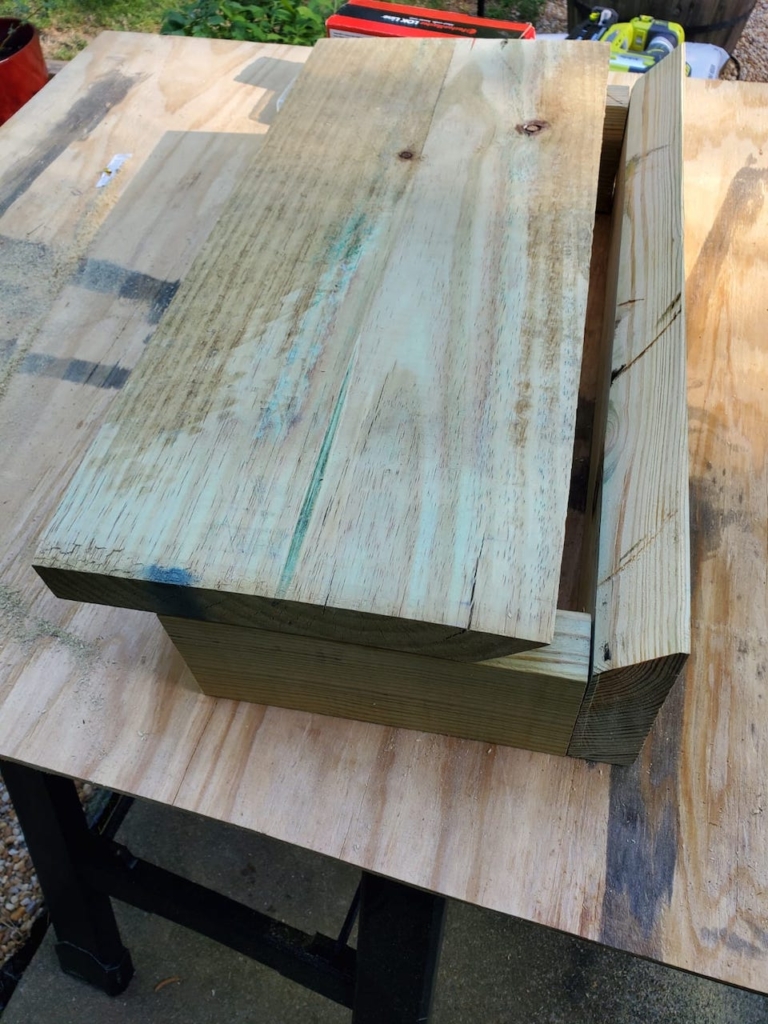
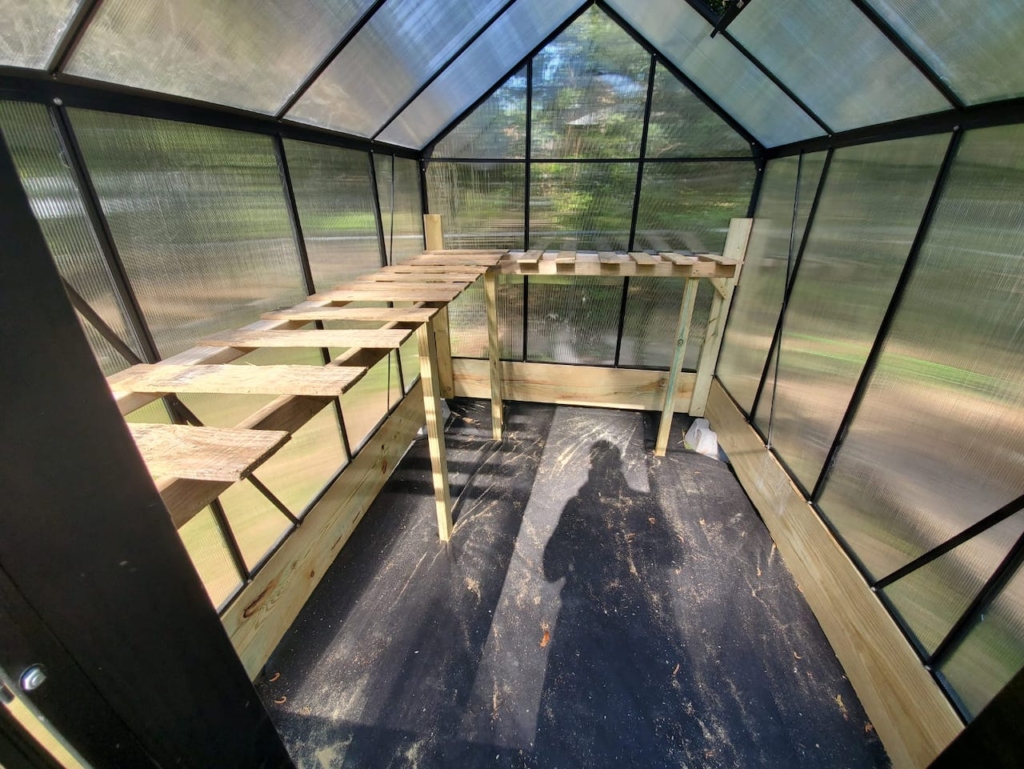
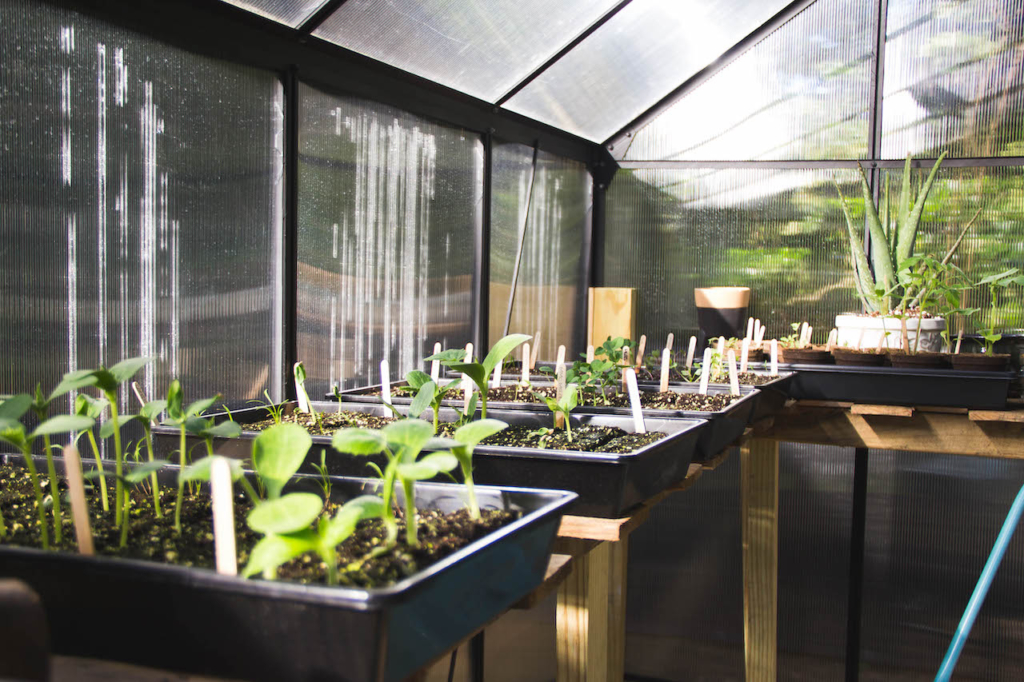
In an effort to use as many of the materials we already had on hand. We used some pallets from a recent delivery to create the tables for the inside of the greenhouse. He used the existing frame and a few more 2x4s for the base of the table and measured and cut the pallets to be the tops of the tables.
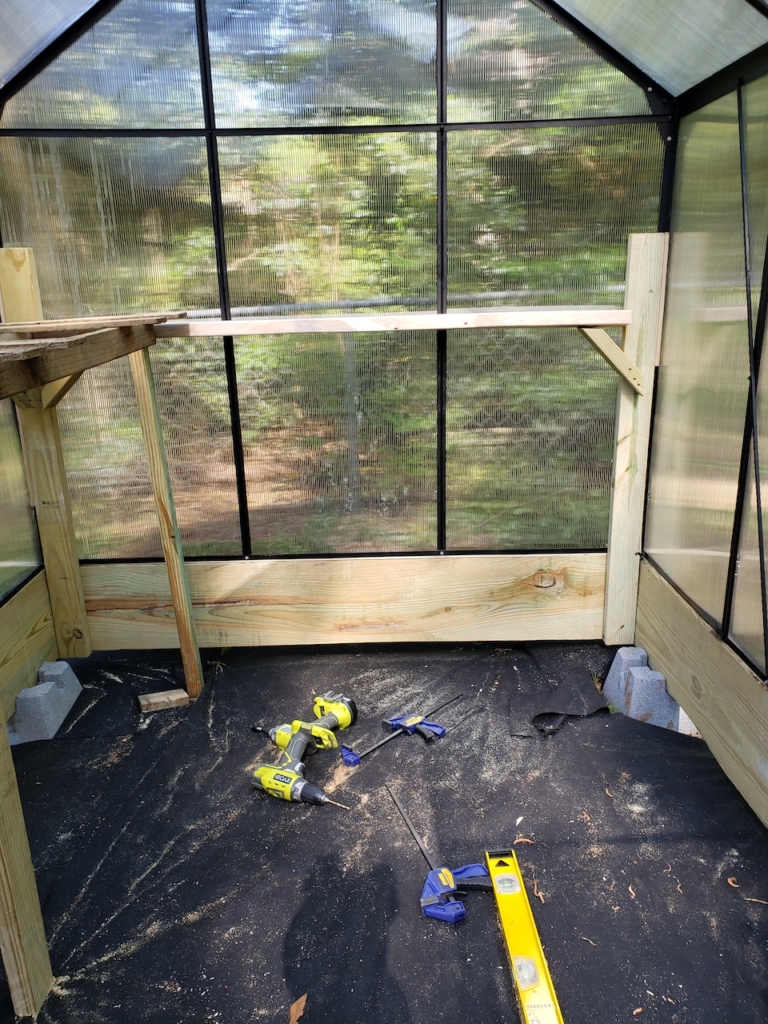
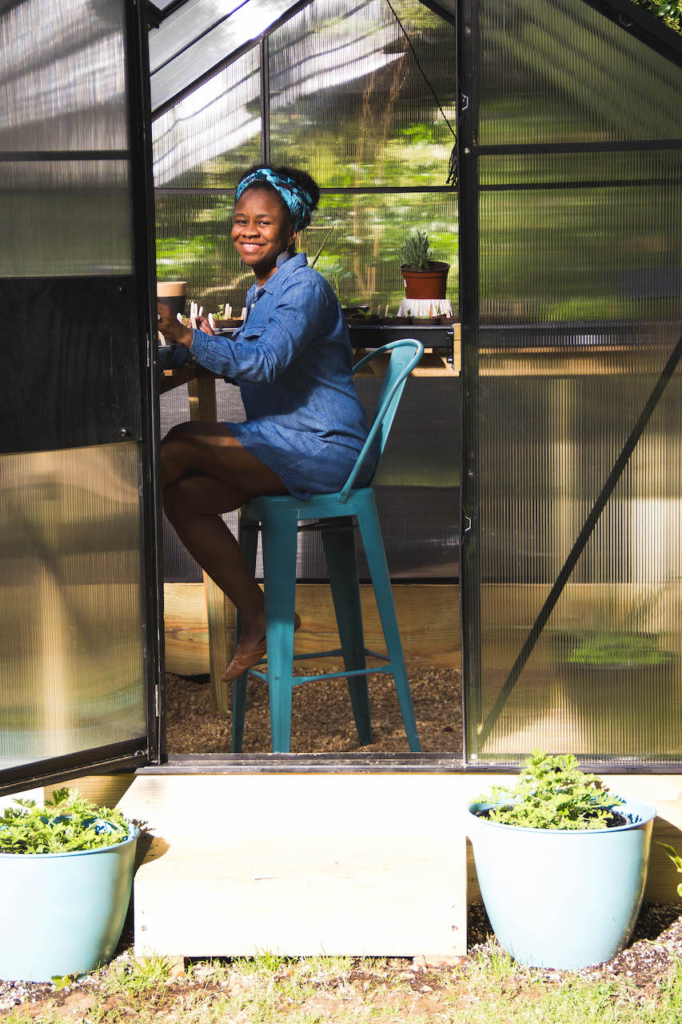
We are not sure how long these tables will last, but for now they work pretty well. I asked him to only build tables for two sides so that I could utilize the other side for containers and the rack I currently have in the garage. I also asked that the tables be built the height of a high counter so that I can use a stool to sit on.
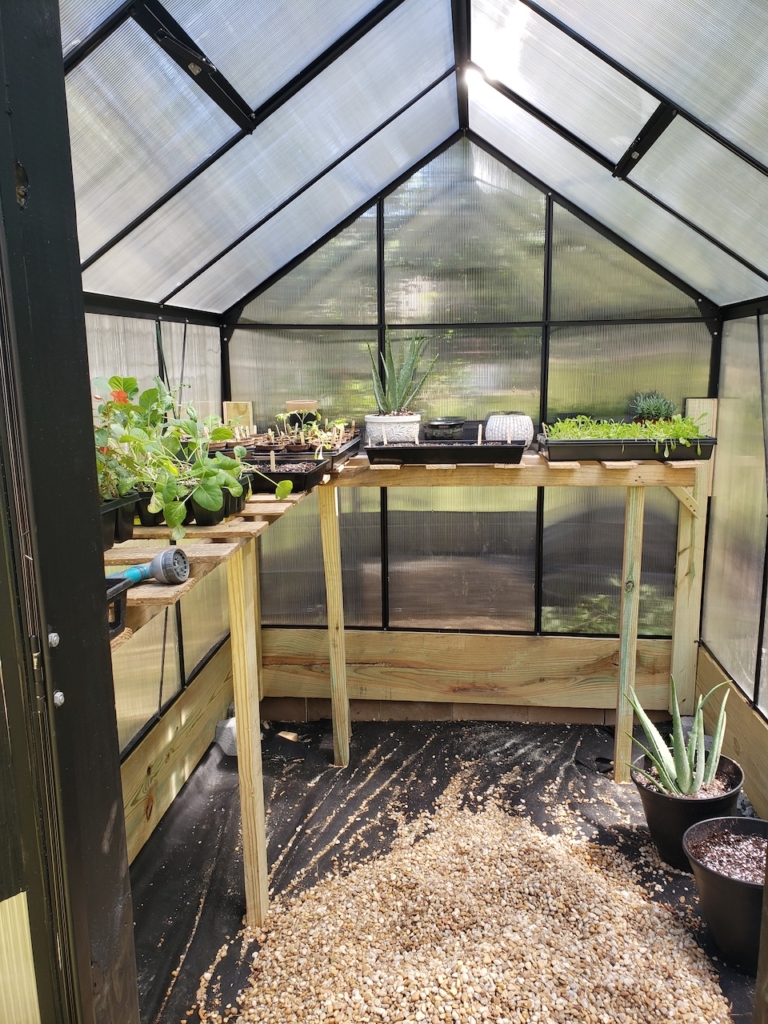
After moving pea gravel in to cover the ground, it was time to move in! My husband was so ready for the plants to move out of the garage that he started bringing them out before I could! Once the plants came in, everything started to feel really real! The one thing that is left is setting up a solar light for the inside. Just in case I need to come in the middle of the night and check on my plant babies.
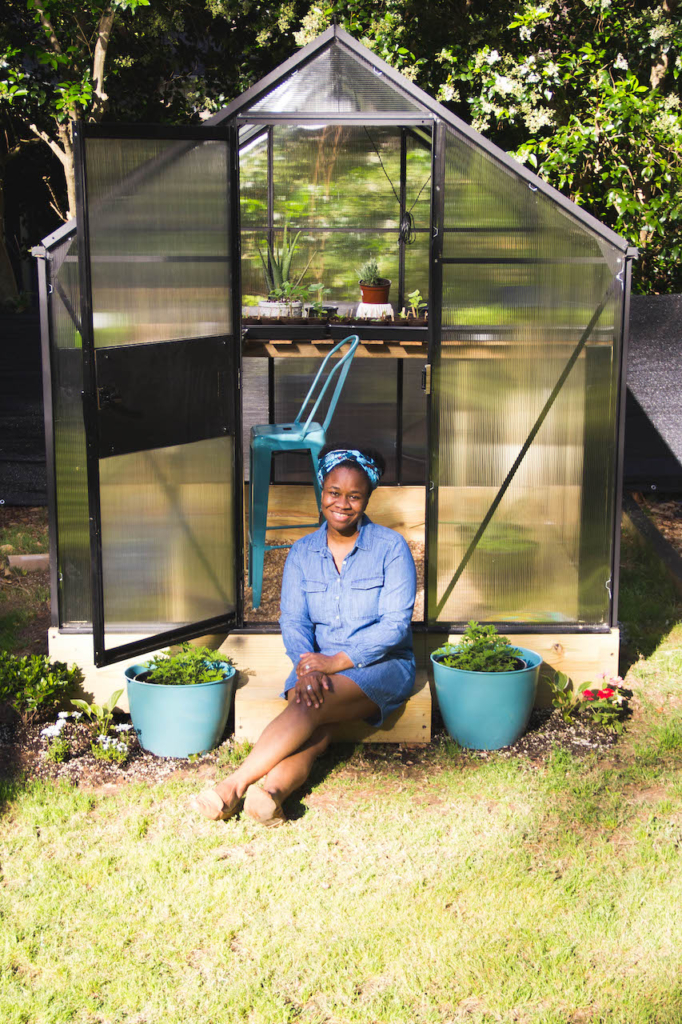
This DIY greenhouse has been such a wonderful addition to our backyard garden. What was once a dream for our home garden has become real life! The ability to grow plants year round is extremely important to me and this puts us one step closer to making that dream a reality. We were able to build this amazing greenhouse with a small budget and it totally meets our needs.
So what do you think? Would you put a greenhouse in your backyard? Don’t forget to head over and check out the other One Room Challenge participants!


Stacie it looks amazing!! I just love it!! can’t wait to keep following!
Thank you so much Deb!
Stacie!!! This looks amazing. Can’t wait to see it all come together 🙂
Thank you Torie!
wow this is amazing! I have always wanted a green house and wish I have a backyard to do the same! BRAVO!
Thank you so much Tim! I hope you will be able to have a greenhouse someday soon!
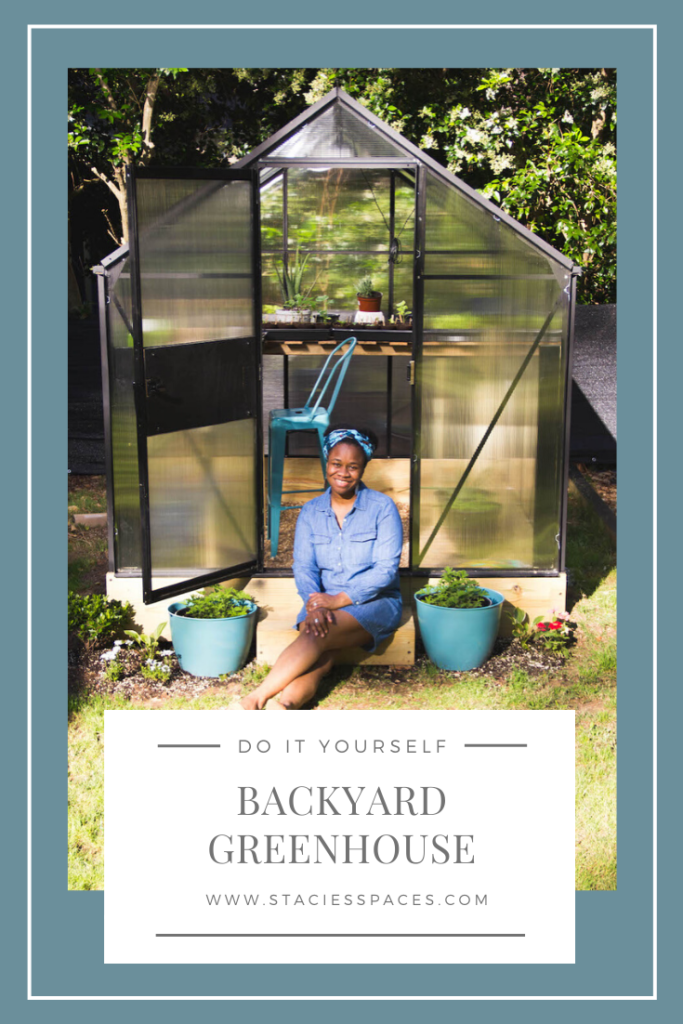
You already know im so EXCITED for your project! I love the photo of you in front of your greenhouse. So beauTiful!!
Thank you Nicole!
Awww! Stacie you look so cute and I love your GREENHOUSE.
Thank you Gbeke!
It turned out amazing! I want a greenhouse so badly.
Thank you so much! You should get one! I love it!
Greenhouse came together beautifully! what A PERFECT ADDITION TO THE BACKYARD
Thank you so much Holly! I am really enjoying it!
That greenhouse is too cute – I bet you are going to grow some amazing thing in there
Thank you! I sure hope so!
I LOVE how it turned out!!! Great job!
Thank you Angela!
Love, love, love the greenhouse, Stacie! And I love how the black paint gives it a modern edge without being too edgy!
Thank you so much! That was exactly the goal!
Comments