March 5, 2020
If you are following me over on Instagram then you know how excited I am about my garden this year! We are expanding the space a little bit and building new raised garden beds and hopefully a good fence with spikes to keep the critters out! The mudroom/laundry room is our primary entry point to the backyard which is where my garden is located. What that means is that I track a lot of mud and dirt into this space. This a multi purpose space so it gets tons of daily use. With all of the laundry, the housing of the boys’ school stuff, and entry points to both the backyard and the garage this room is constantly utilized. It was important to me that the design of this DIY boot tray added functionality to the space without making the room feel cluttered.
As with most of our DIY projects, this one started because we had a problem to solve. I work in my garden spaces several times a day and I am constantly trying to find a good location for my sometimes muddy garden boots. I realized that our boys have their little lockers/cubbies to house their shoes, however, my husband and I did not have a dedicated space for our garden boots. I decided that would need to change if I truly wanted to stop tracking dirt all over the place. I also determined that it would need to be created for as cheap as possible, be able to house at least two pairs of shoes, be easy to clean, and fit in with our current mudroom design. I spent hours upon hours (okay that may be a little dramatic) searching for ideas from a basic shoe mat and more delicate looking shoe trays, before finally deciding to build a simple wooden boot tray.
Thanks to the many DIY projects we have completed recently, we were able to create this boot tray primarily using supplies we already had on hand. This is a very easy build, definitely something a beginner woodworker could complete.

One of the first things we did was to actually grab our boots. We did not use any specific measurements because it was important for us to ensure that the size of the tray met our specific needs. Once we had the measurements we added a few inches to accommodate for the frame.
We used the circular saw to cut the board to size (we cut ours to 20.5 inches by 16.5 inches). We then used the miter saw to cut the 1 x 2 board down to 22 inches by 18 inches.

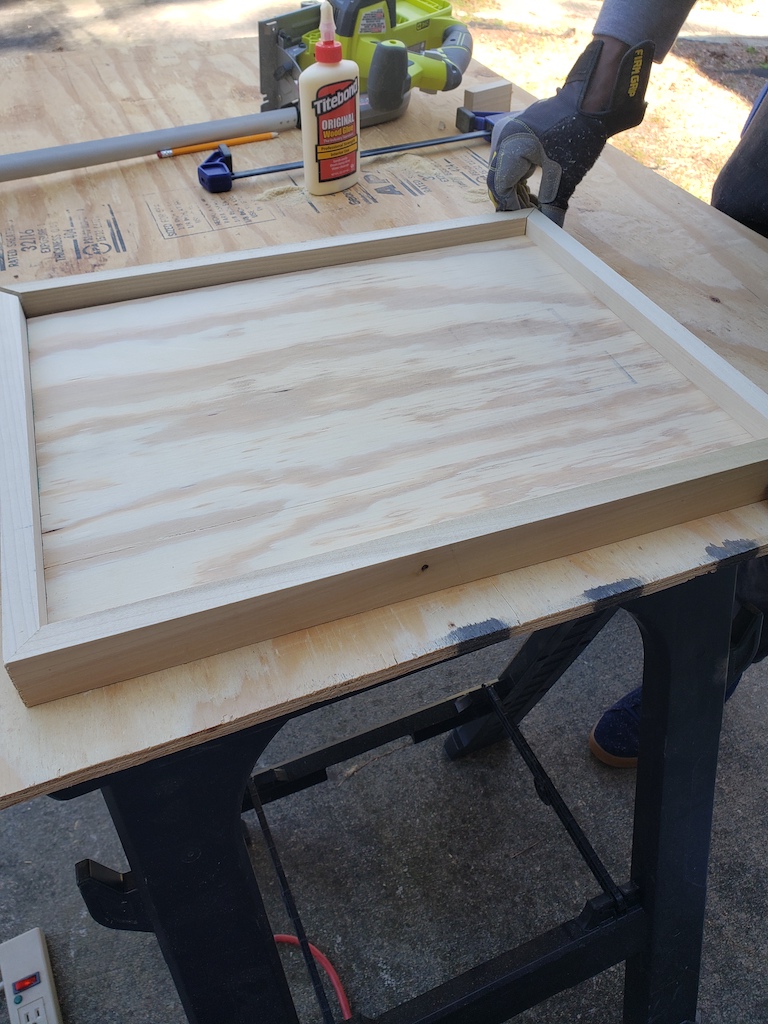
Once we made sure everything fit together, we used wood glue and then finishing nails to attach all of the pieces. During this step we also made sure to sand everything down, especially the frame or outer pieces.
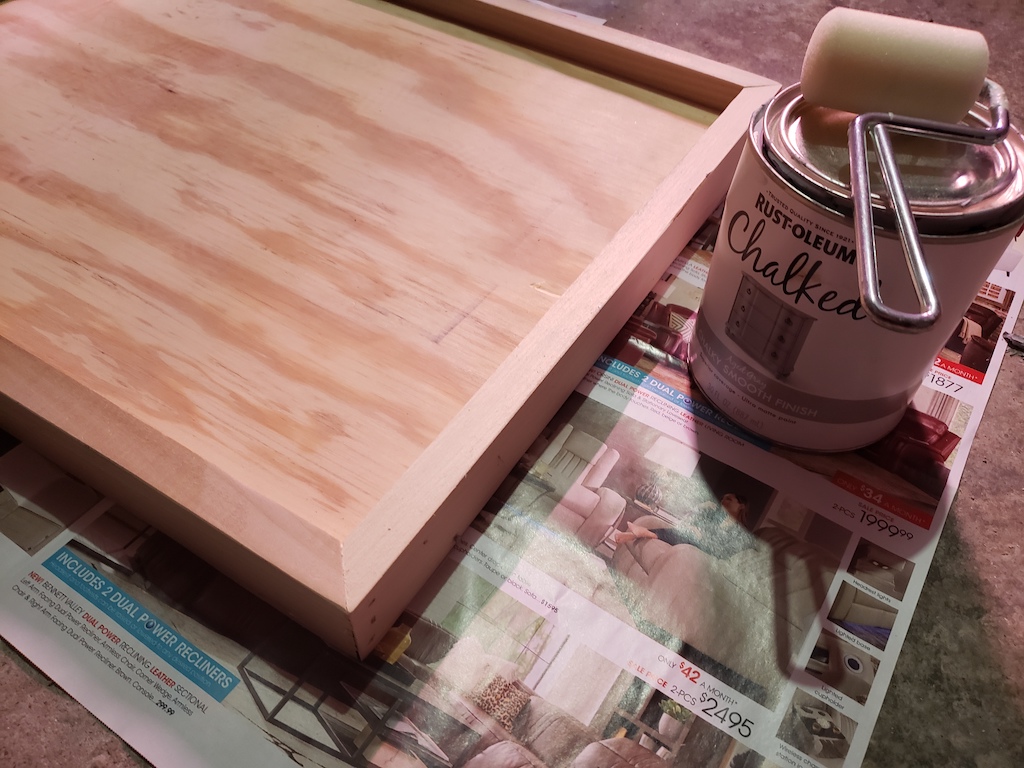
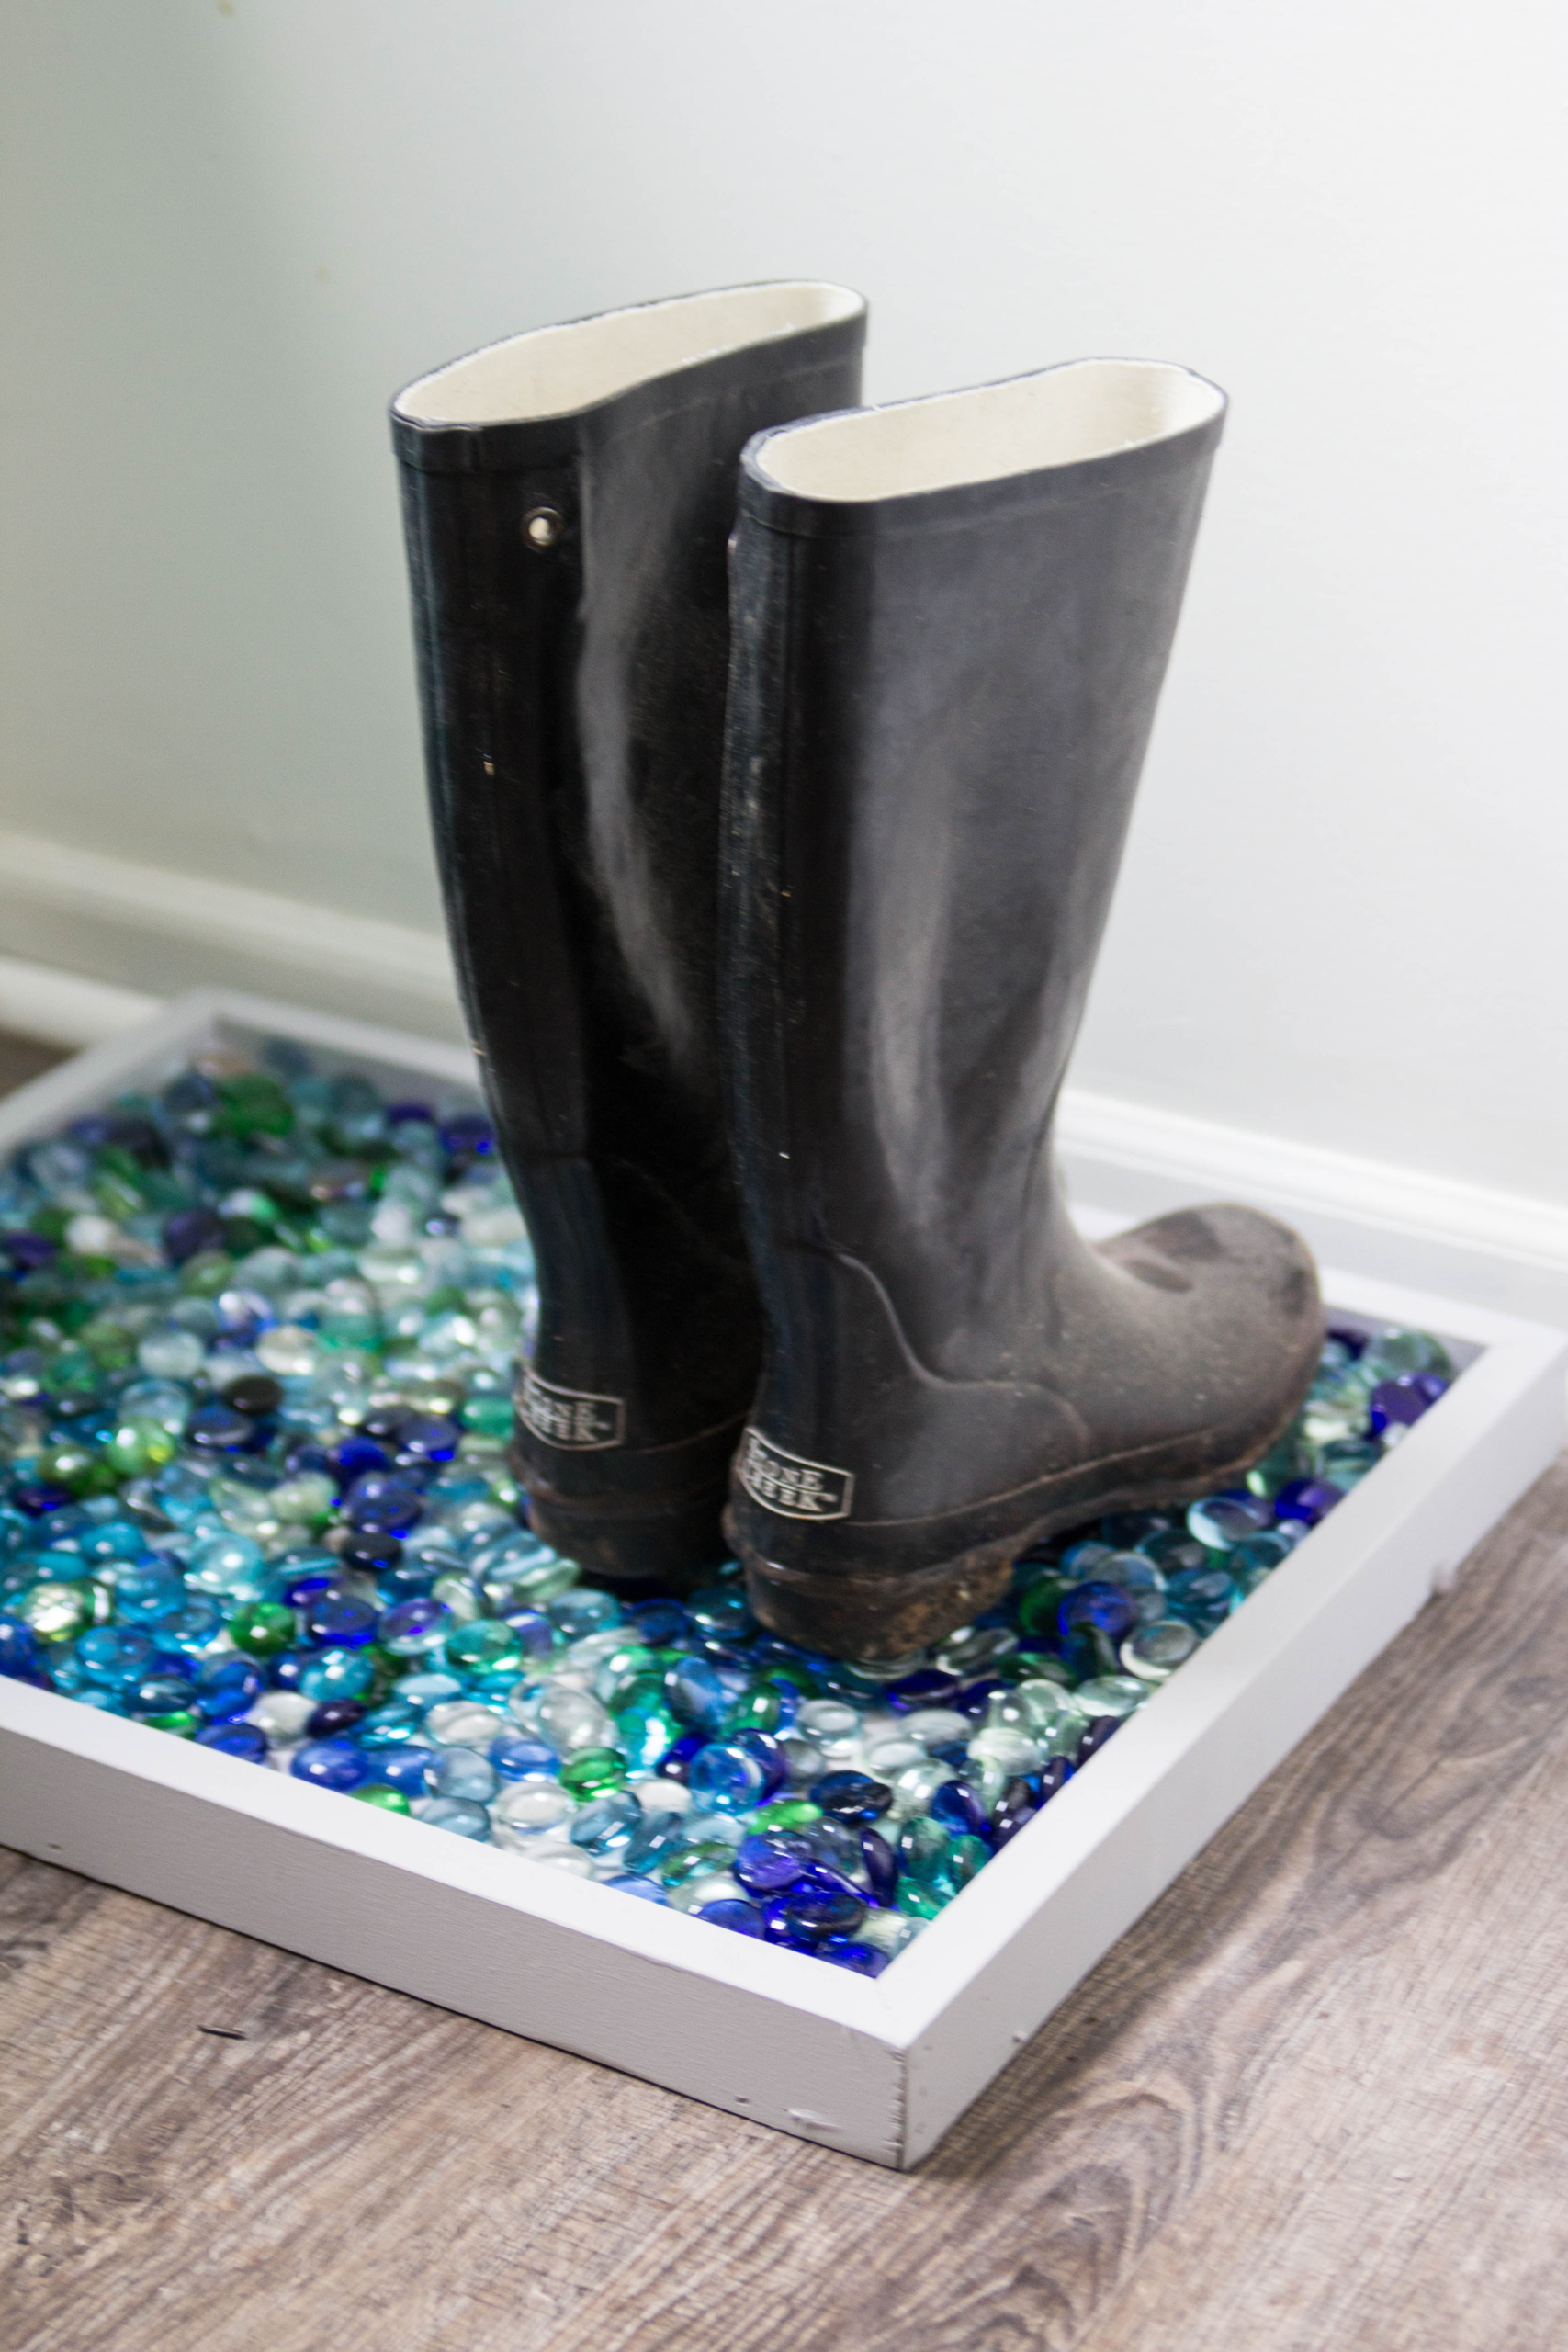
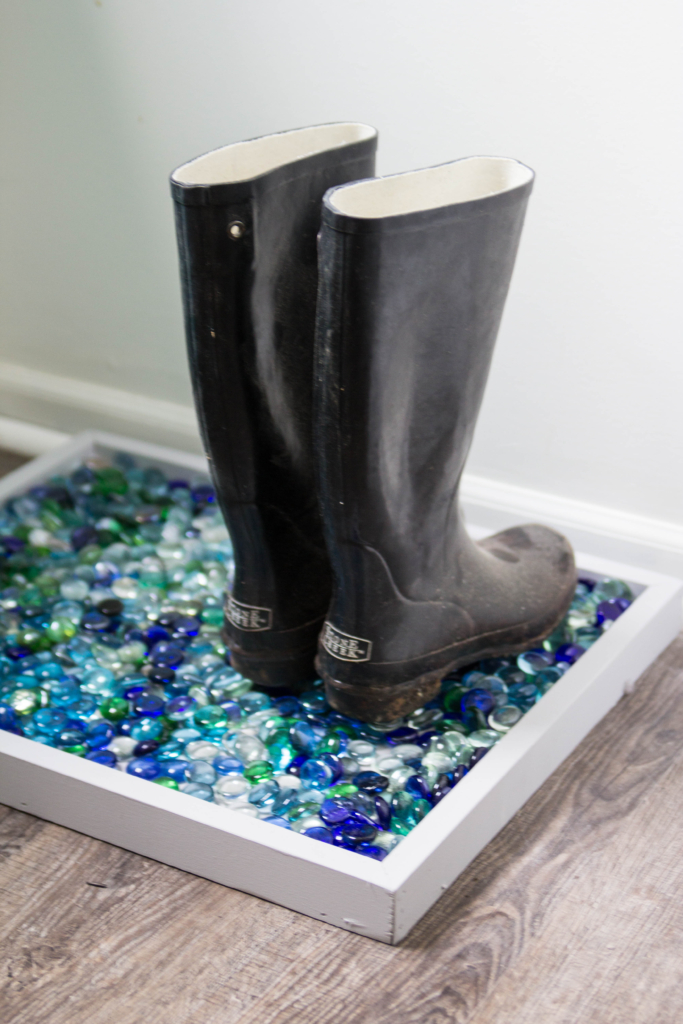
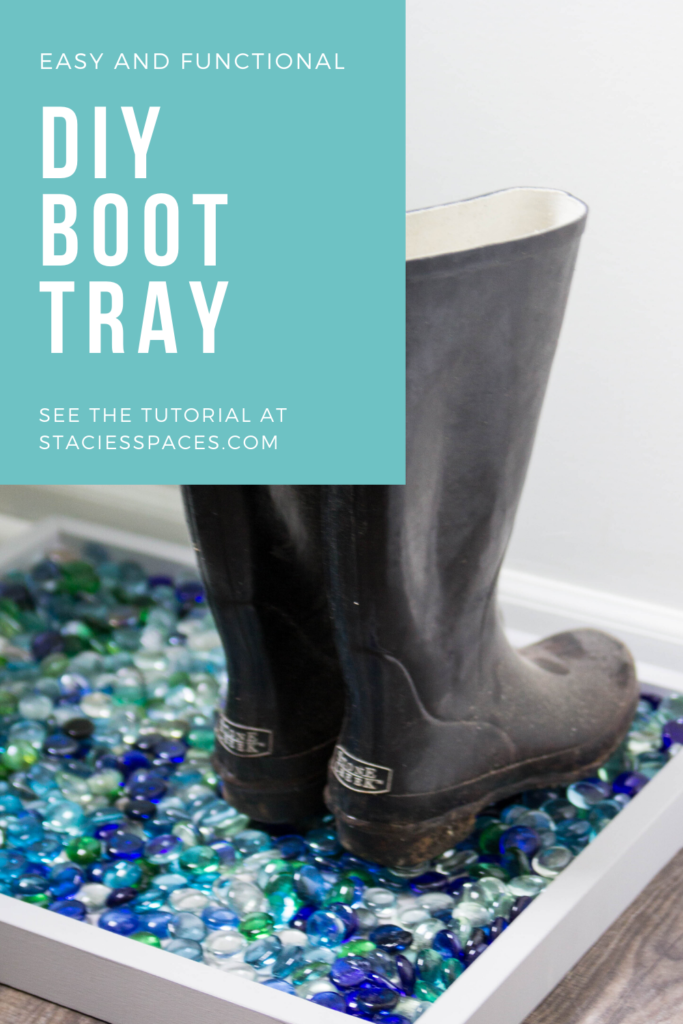
I debated about staining the tray gray or painting it white. I ultimately decided to use what was readily available in the house and pretty durable seeing that it may get pretty banged up. So I painted it with a light gray chalk paint using the foam roller. The foam roller allowed the paint to go on really smooth and because it is chalk paint I do not need to apply anything else. Next, I went to dollar tree and purchased thirteen of the little bags of glass gems (you could also use river rocks) in various shades of blues and greens to coordinate with the colors in our laundry/mudroom. I really love how it turned out! It is super easy to create and very functional. Completing this project made me even more excited to get in the garden and get to work!


Comments